This article explains how to create, customise, and manage your email templates in order to automate and professionalise your communication with your clients.
Summary:
- How to access email templates
- How to create a new template
- What placeholders are used for
- Placeholder summary table
- Using email templates on your sales documents
How to access email templates
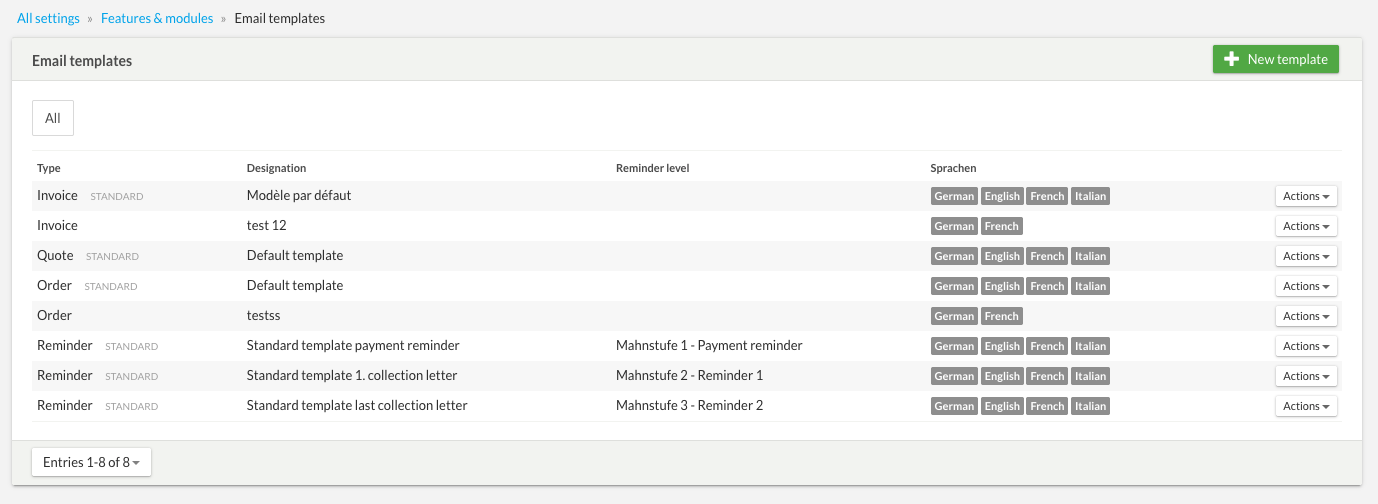
To access template management, go to:
Settings → All settings → Features & modules → Email templates
From this page, you can create new templates or modify existing ones.
How to create a new template
- Select document type: Choose the document the template will apply to (Quote, Invoice, or Reminder) and give it a clear name.
- Set language: Select the language(s) for which this template will be available.
- Set as default: You can set this new template as the standard (default) template for the selected document type.
Important for automatic reminders: Please kindly note that for reminder emails, all your templates must remain standardised and be available in all languages used by your clients. This configuration is essential to ensure the proper functioning and correct triggering of automatic reminders.
What placeholders are used for
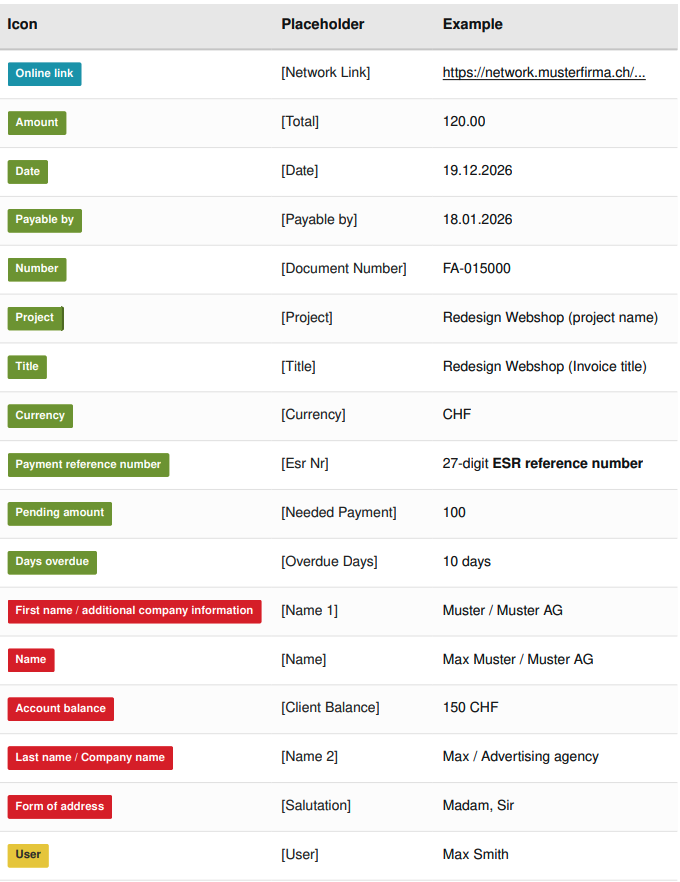
To automatically personalise your emails, you can insert different types of placeholders into the body of the text as well as into the “Subject” field.
The colored buttons help you identify them quickly:
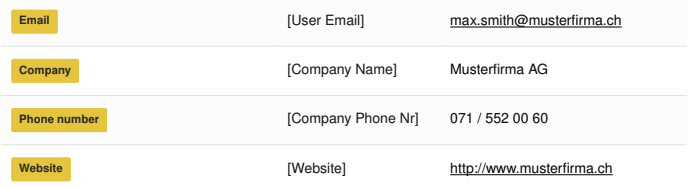
🟨 Yellow: Information related to the user (you/your company).
🟥 Red: Information related to the client (recipient).
🟩 Green: Information related to the document (dates, amounts, document numbers).
🟦 Blue: The link to the online document.
Link to the online document: This placeholder is mandatory. Without it, you cannot save email templates.
Placeholder summary table
Important notes regarding the use of placeholders:
- Accuracy of contact data: In order for these placeholders to be filled correctly in your emails, make sure that the corresponding information has been entered accurately in your contact card. If a field is empty or misspelled in your contact management, it will display the same way (or remain empty) in the email.
- Subject line customisation: You can definitely insert placeholders directly into the “Subject” field of your templates to personalize your messages right upon receipt.
- Behavior of the
[Name] field:
The system automatically adapts the display according to the recipient type:
- For a company: the “Company name” field is displayed.
- For a contact person: the “First name” and “Last name” are inserted.
Using email templates on your sales documents
Once your new template is saved or your changes are made, they are immediately operational for your next mailings.
When sending an invoice by email, you can either leave the default template (which applies automatically) or manually select another template of your choice from the drop-down menu just before clicking send.
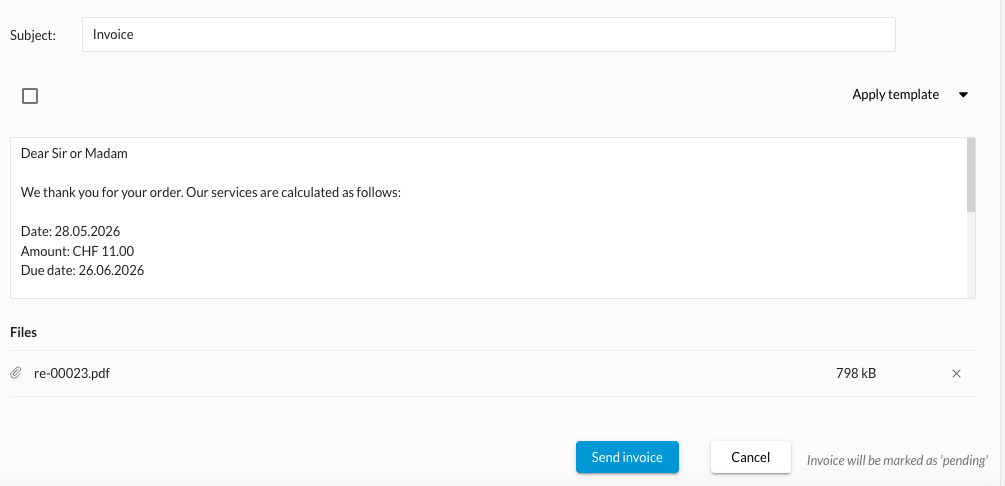
If you use the sending mode “Send via your email software”, the text generated by your bexio template will also be used when your email software opens.