Use our dedicated templates to import or update your chart of accounts. Your data will be uploaded and ready in just a few seconds.
Summary:
How does the import process work?
Important:
The import function is only available if no journal entries refer to a system account or a linked account. Importing the chart of accounts is therefore possible if such entries are completely removed from all created fiscal years. However, if manual entries have already been recorded, they must be deleted before proceeding with the import.
If you wish to erase all your entries, please refer to this article: How to delete all data. Once the data has been deleted, you will be able to import your chart of accounts again.
There are two options available for importing your chart of accounts, depending on the status of your accounting setup wizard:
- The Accounting Wizard is still open
- The Accounting Wizard is already closed
1. The Accounting Wizard is still open
If you are a new customer, get started by launching the accounting setup wizard under: Accounting → Set up accounting.
If the accounting setup wizard is already closed or no longer appears, you can find it under: Accounting → Year end closing → Import balance sheet and income statement.
Under step 3 of 8, you can define your chart of accounts.
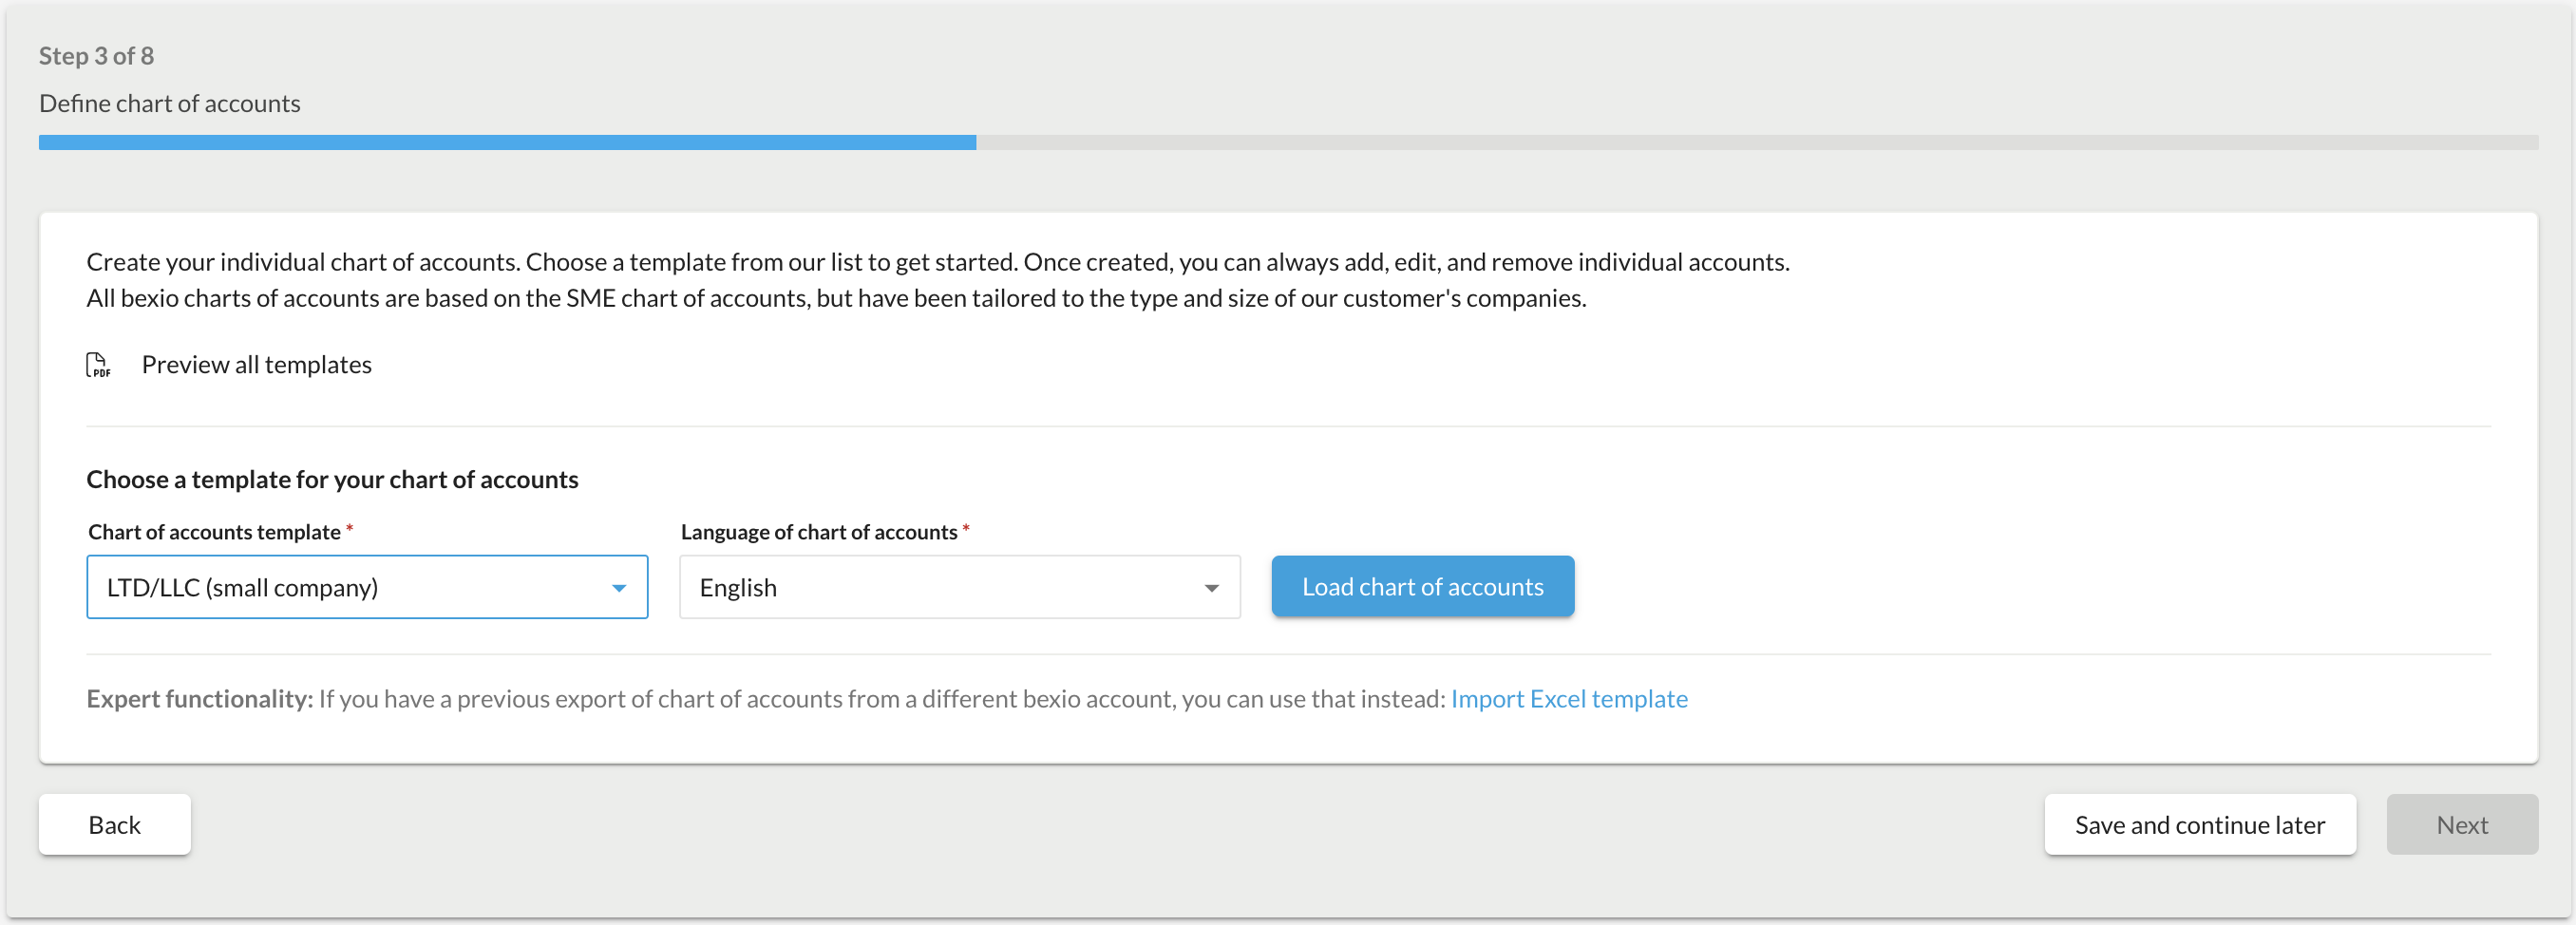
Scroll down to the bottom of the page to reach the Expert Functionality section. To the right of this mention, click on the import button to upload your Excel template.
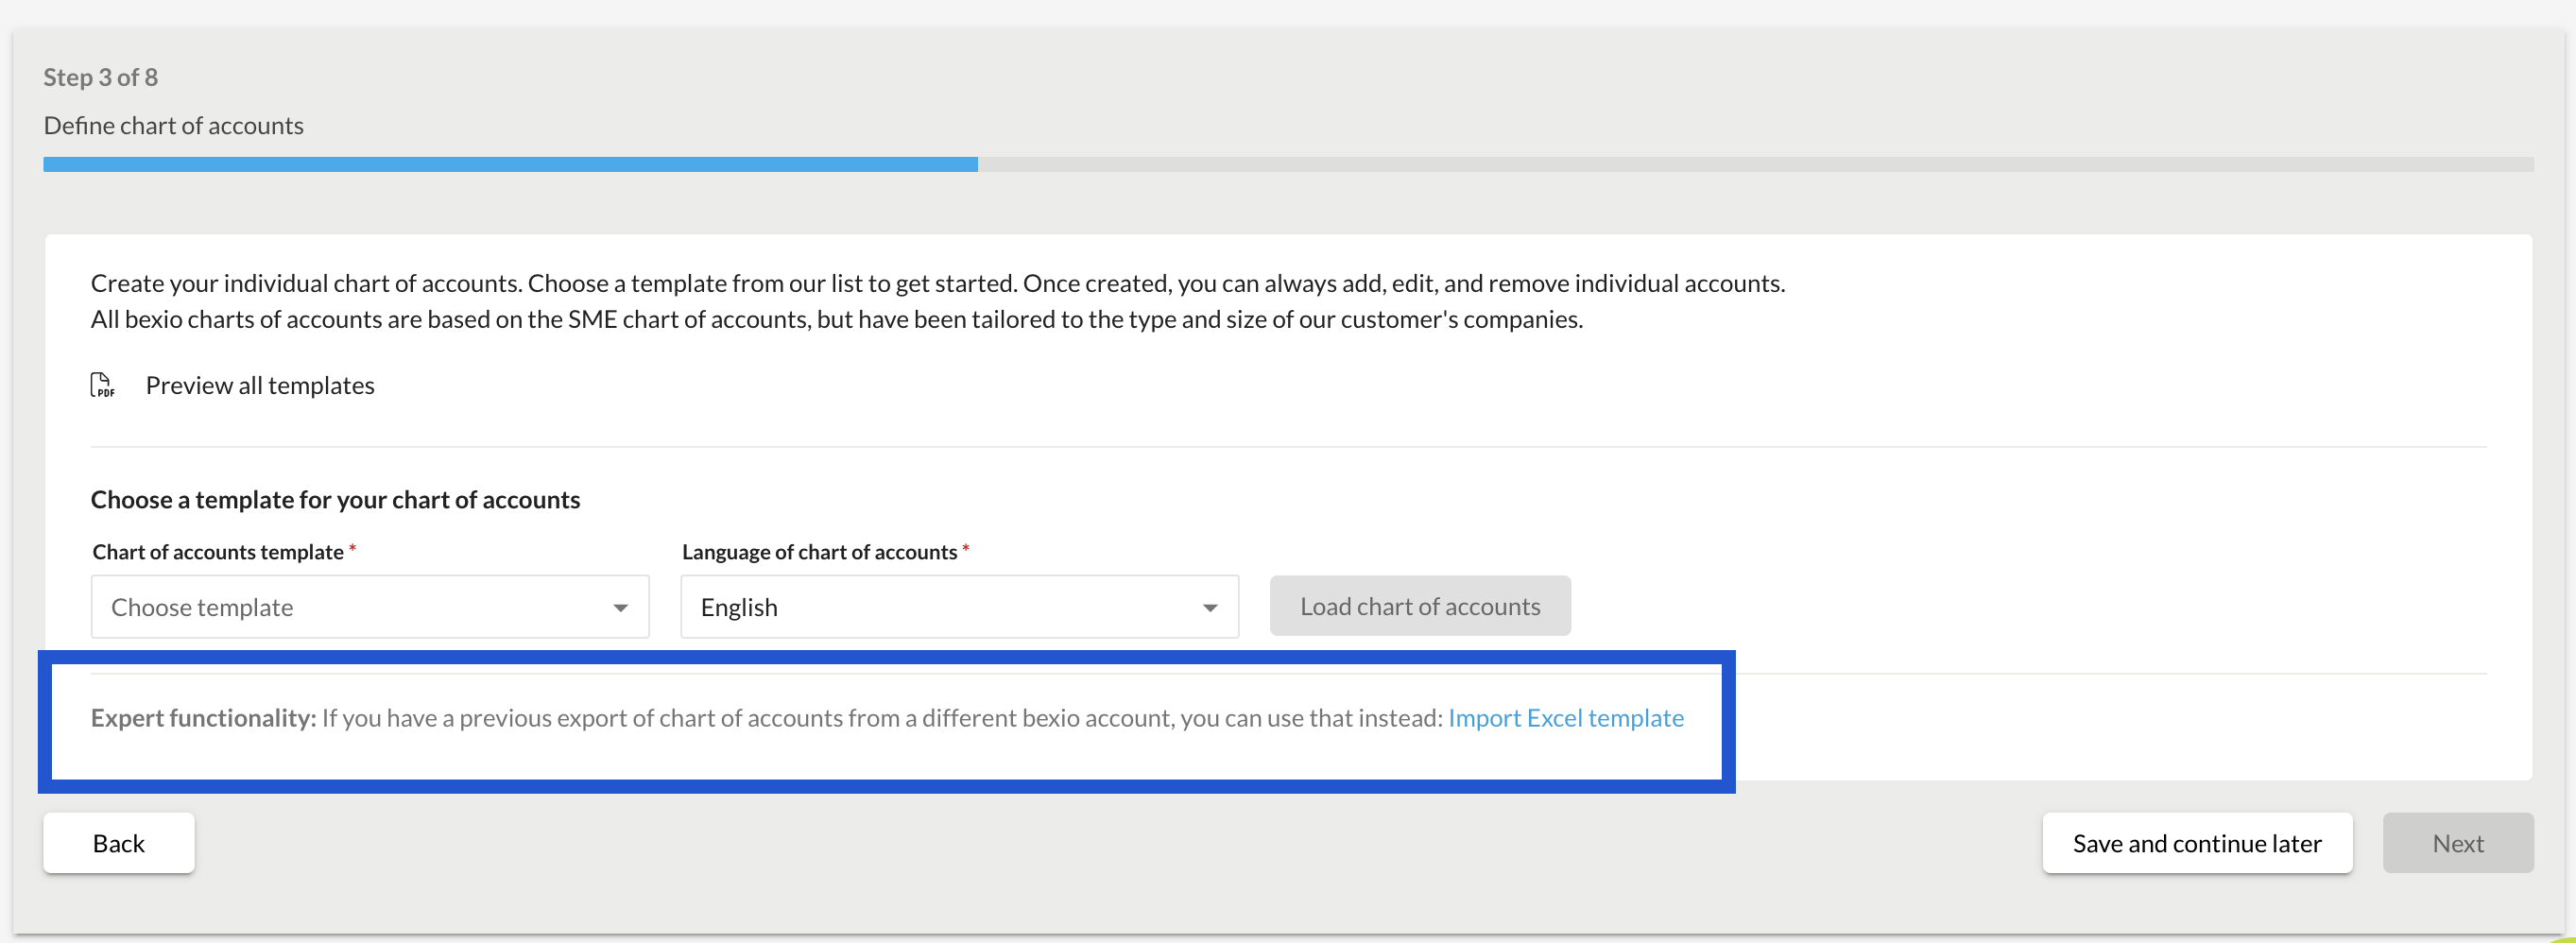
Important: Only use this expert feature if you have an excellent understanding of accounting and are already familiar with our software.
2. The Accounting Wizard is already closed
If you have already closed the accounting setup wizard, you can modify the chart of accounts in your general settings.
Under "Settings" → "All settings" → "Accounting" → "Chart of accounts", you will see two icons in the top right corner. The right button allows you to download your current chart of accounts in Excel format. The left button allows you to import your chart of accounts again.
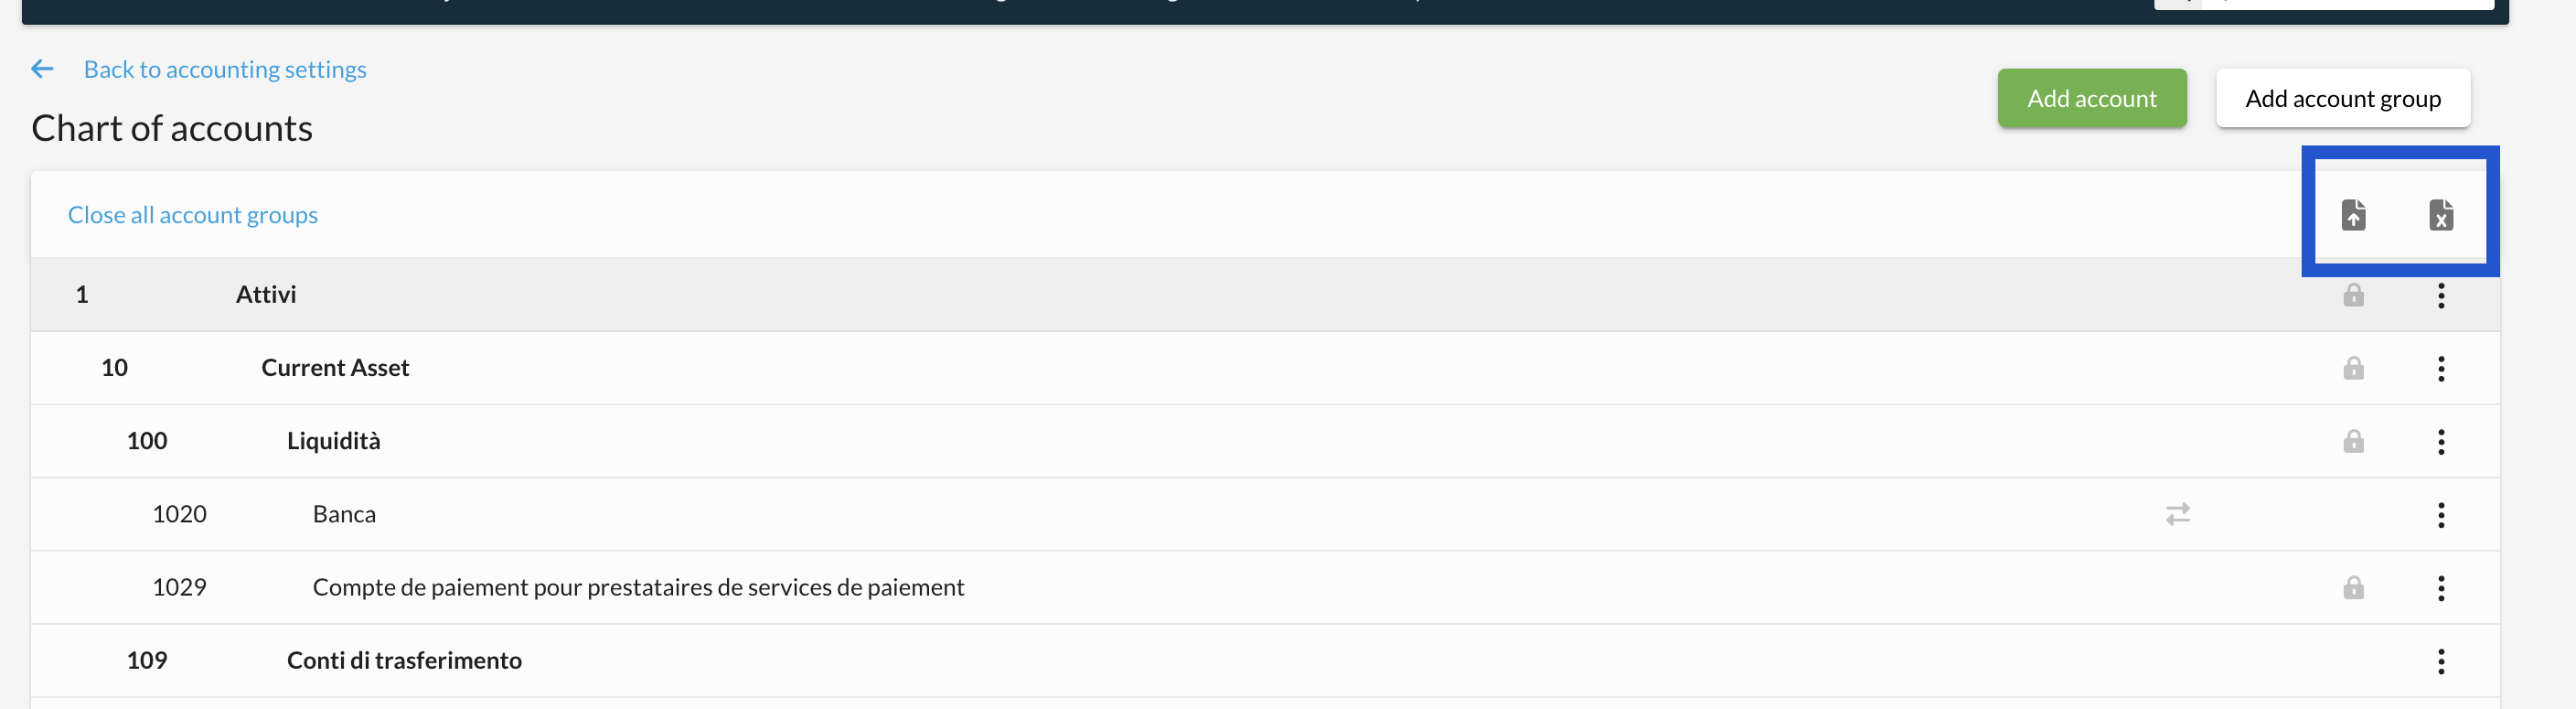
Recommendation: Download and save your current chart of accounts before importing a new one. This will ensure you keep a backup copy.
After clicking on Import, the following warning message will be displayed. Please read it carefully:
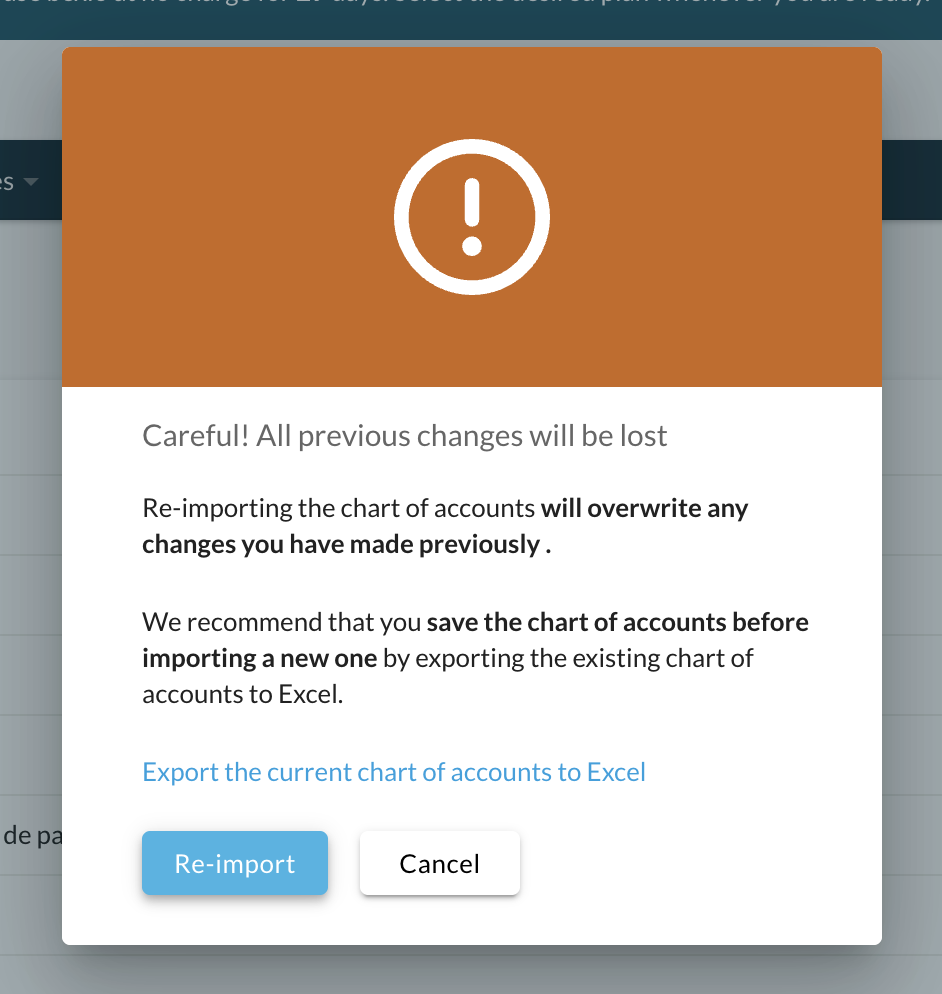
Excel Templates for Import
Structure of the Excel file
The Excel sheet is divided into 6 columns. Columns marked with an asterisk (*) are mandatory.
| Number* | This field corresponds to the account number. It allows you to define the numerical code associated with each account in your chart of accounts.
Account numbers must contain digits only, without any separators, dots, or commas (e.g., use 3401 instead of 3401.1). |
| Name* | This field corresponds to the account name. It allows you to define the title that will be displayed on your financial documents. |
| Group* | Link your account groups here. Please note: to maintain a logical structure, the referenced account group must already exist. |
| Account Type* | Four account types are available: Asset, Liability, Revenue, and Expense. Select the type corresponding to the account you are configuring.
Ensure consistency: the account group must match the selected type. Example: account 3200 (type «Revenue») must be assigned to the account group «Sale of goods». |
| System Account | System accounts must not be modified, otherwise the import will not work. |
| Tax Type | Select the VAT type here. You can choose from the following 3 valid tax codes:
sales_tax : Turnover tax (collected VAT)pre_tax_material : Input tax on materials and servicespre_tax_investment : Input tax on investments and other operating expenses
|
Import requirements:
Below is the list of important points to check before proceeding with the import:
- The file must not exceed 500 accounts and account groups combined.
- Account numbers must contain digits only, without any separators, dots, or commas (e.g., 3400 or 3401 etc.).
- Do not change the order or the names of the original columns.
- Any additional columns must strictly be added at the end of the file. If this is not the case, they will not be taken into account during the import.
- The file is automatically validated upon upload. If any errors are detected, they will be displayed during the import process. You will then need to correct them directly in your Excel file.
- Tip: Do not forget to save your Excel file before restarting the import.
Chart of Accounts: We recommend following the standard structure of account classes from 1 to 9.